
Gel nails are gorgeous and long-lasting, but removing them incorrectly can leave your nails weak and damaged. Don’t peel or scrape — instead, follow this safe method you can do at home with tools easily found in U.S. drugstores.
What You’ll Need
- Nail file (180 grit) – about 6.5 inches long
- Pure acetone (100%) – usually sold in 8–16 fl oz bottles
- Cotton balls/pads – about 1 inch diameter each
- Aluminum foil – cut into 3×3 inch squares
- Cuticle pusher or orangewood stick – about 4–5 inches long
- Nail buffer
- Cuticle oil
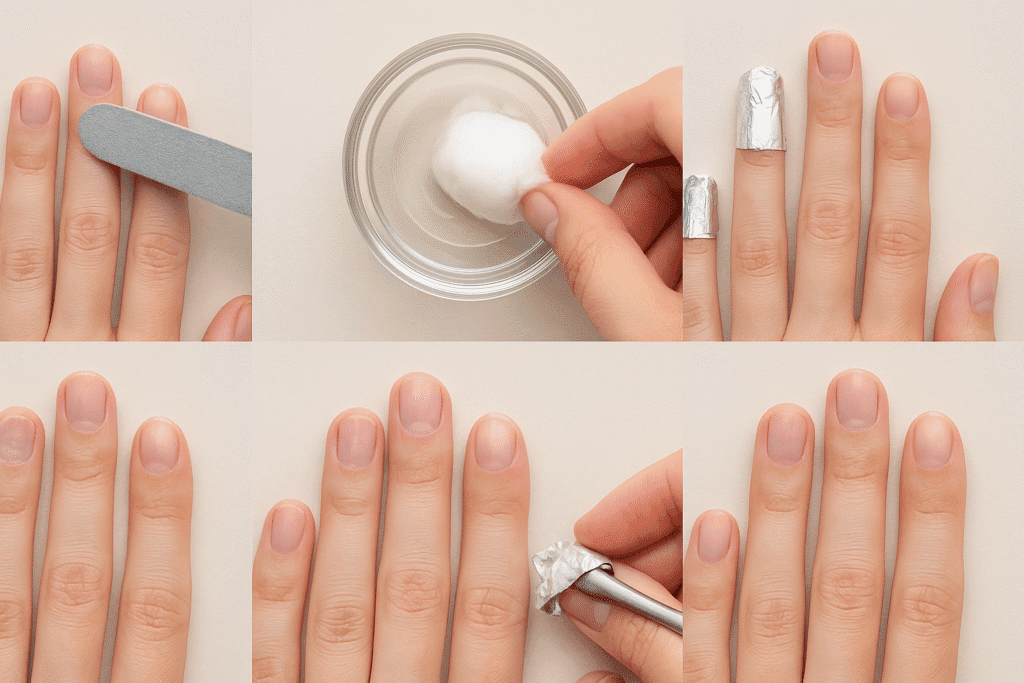
Step 1: File the Top Coat
- Use the 180-grit nail file to gently remove the shiny surface of the gel.
- Stop when the surface looks matte — this helps acetone work faster.
Step 2: Soak Cotton in Acetone
- Pour pure acetone into a small dish.
- Soak each cotton ball until saturated but not dripping.
➡ Safety Tip: Work in a well-ventilated space.
Step 3: Wrap Your Nails
- Place the soaked cotton on your nail.
- Wrap each fingertip with a 3×3 inch square of foil to hold it in place.
- Repeat for all nails.
Step 4: Wait 10–15 Minutes
- Let the acetone break down the gel polish.
- For thicker layers, wait up to 20 minutes.
Step 5: Remove and Push Off Gel
- Remove foil and cotton one nail at a time.
- Use a cuticle pusher to gently slide off softened gel.
- If stubborn spots remain, rewrap for another 5 minutes.
Step 6: Buff and Hydrate
- Buff nails lightly to smooth the surface.
- Apply cuticle oil to restore moisture.
Extra Tips
- Never peel gel polish — it can strip nail layers.
- Warm acetone slightly (place bottle in warm water) for faster removal.
- Follow with a nail-strengthening treatment.
Final Thoughts
With the right tools and patience, you can remove gel polish at home just like the salon — without harming your nails. These size guides and visual tips make the process easy, safe, and effective.