

Knowing how much RAM you have on your Windows computer is essential for understanding its performance capabilities. Whether you’re a tech enthusiast or a casual user, being able to check your RAM is a valuable skill. In this guide, we’ll show you how to check how much RAM you have on Windows 11, Windows 10, and Windows 7.
Guide to How to Check What Type of RAM I Have | Windows, Mac, Linux
How to check RAM on Windows 11
Here’s how to check how much RAM you have on Windows 11:
- Type “About your PC” into the Windows search box, and when the choice to open it comes up, click it.
- In the part called “Device Specifications,” your total RAM capacity is shown next to “Installed RAM.”
- You can find information about RAM next to “Installed RAM” in the “Device Specifications” part.
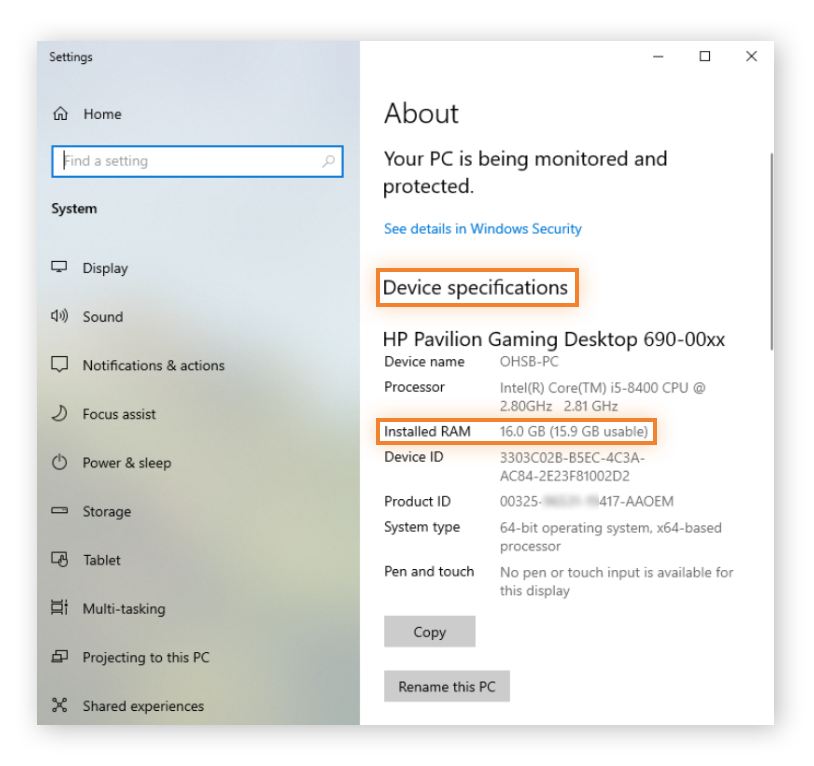
How to check RAM on Windows 10
- Type “About your PC” into the Windows Start menu, and when the choice to open it comes up, click it.
- In the part called “Device Specifications,” your total RAM capacity is shown next to “Installed RAM.”
- It shows the Windows About screen with the Device Specifications and 16.0 GB (15.9 GB useful) of RAM next to Installed RAM.

Other common Methods for Check RAM in Windows 11/Windows 10/Windows 11
Method 1: Check RAM Using Task Manager
The easiest way to check your RAM on Windows is by using the built-in Task Manager. Here’s how:
- Press Ctrl + Shift + Esc on your keyboard to open Task Manager.
- In the Task Manager window, click on the Performance tab.
- Under the Performance tab, you’ll see a section called Memory. Here, you’ll find information about your RAM, including the total amount of RAM installed on your computer.

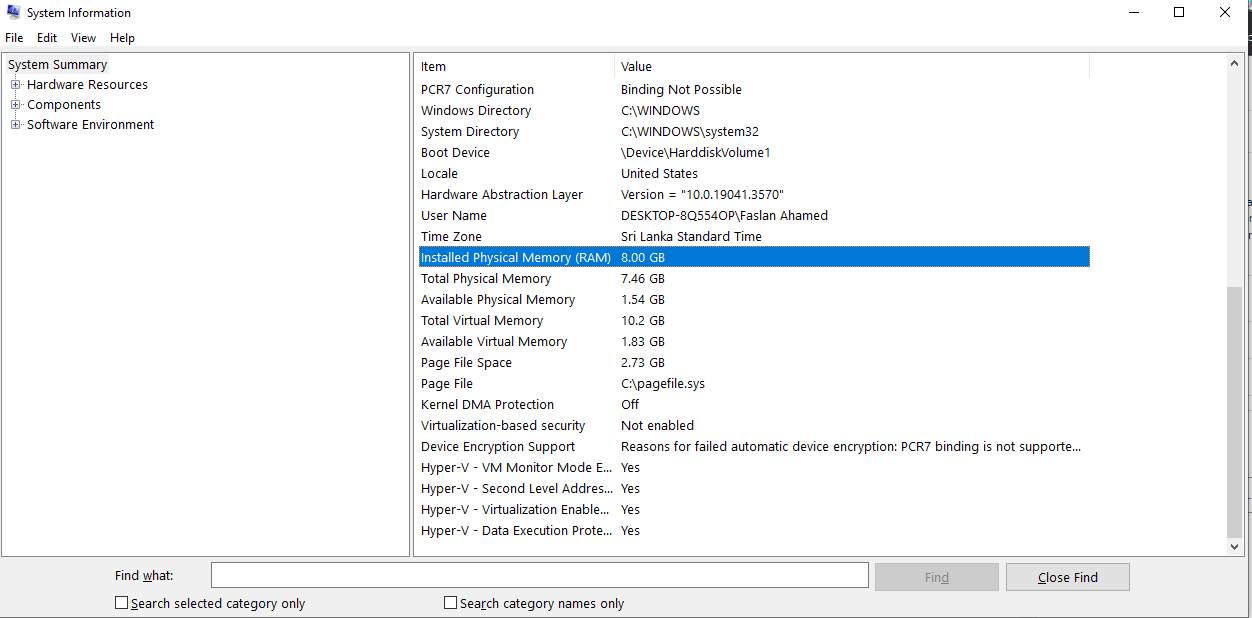
Method 2: Check RAM Using System Information
If you prefer a more detailed view of your system information, you can use the System Information tool. Follow these steps:
- Press the Windows key + R on your keyboard to open the Run dialog box.
- In the Run dialog box, type msinfo32 and press Enter.
- The System Information window will open. Look for the Installed Physical Memory (RAM) field to see the total amount of RAM on your computer.
Method 3: Check RAM Using the Directx diagnostic tool
- Press the Windows key + R on your keyboard to open the Run dialog box.
- In the Run dialog box, type dxdiag and press Enter.
- The System Information window will open. Look for the Installed Physical Memory (RAM) field to see the total amount of RAM on your computer.

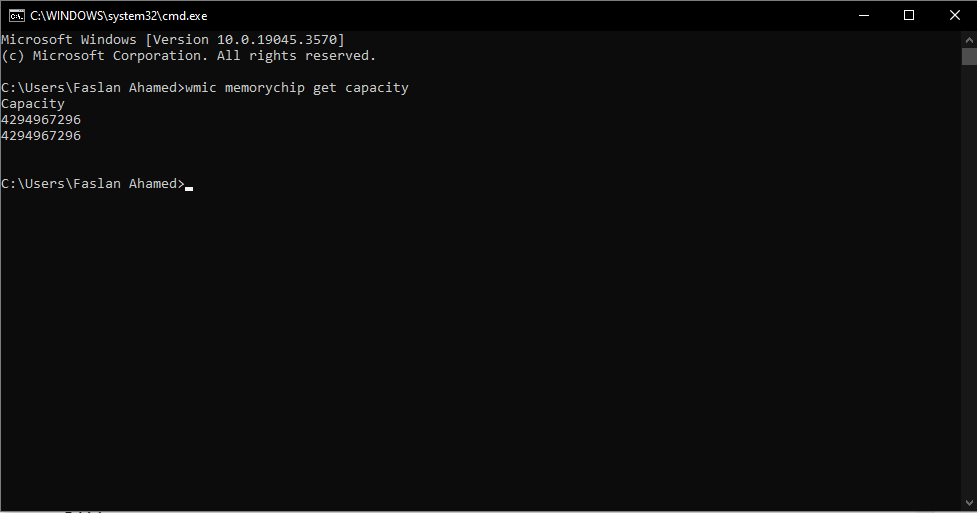
Method 4: Check RAM Using CMD
If you’re comfortable with using the Command Prompt, you can check your RAM using the following steps:
- Press the Windows key + R to open the Run dialog box.
- Type cmd and press Enter to open Command Prompt.
- In the Command Prompt window, type wmic memorychip get capacity and press Enter.
- You’ll see a list of numbers representing the capacity of each RAM module installed on your computer. The sum of these numbers will give you the total amount of RAM.
Method 5: Check RAM Using CPU-Z
- Go to the official CPU-Z website, Download the installer & install it.
- Open CPU-Z and click on the “RAM” tab. see detailed information about your RAM.

Method 6: Check RAM Using BIOS
- Restart your computer, and during the startup, access the BIOS (usually by pressing F2 or Del). Check for memory information.
Checking how much RAM you have on your Windows 11, Windows 10, or Windows 7 computer is a straightforward process. Whether you prefer using Task Manager, System Information, or Command Prompt, you now have the knowledge to check your RAM with ease. Understanding your system’s RAM capacity can help you make informed decisions about upgrading or optimizing your computer’s performance.